Drum Bass With Bitwig Stock Devices Bitwig Project
FANTASTiC | 06 April 2024 | 1 MB
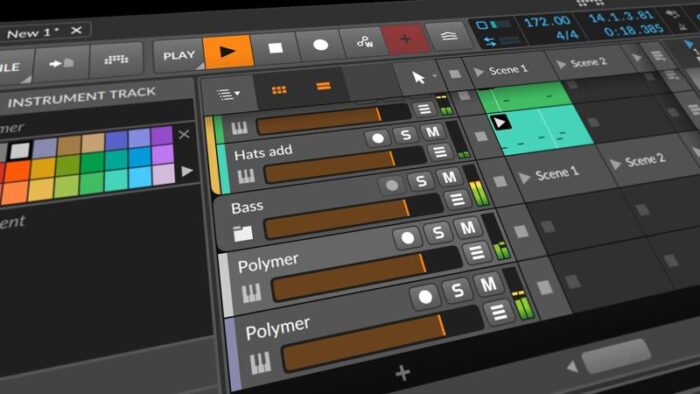
In the video, I create a drum and bass track from scratch using stock devices, focusing on crafting a unique kick drum, layering hi-hats and snares, and experimenting with bass lines and effects for a distinct sound. After laying down the basic structure, I plan to refine the track further, emphasizing the importance of detailed adjustments to achieve the final sound. Here’s a summary of my experience creating a drum and bass track from scratch using stock devices:
•Starting the Track: I decided to work on a drum and bass track at 172 BPM, focusing initially on creating a kick drum. For the kick, I tuned it to G0 (49 Hz), added a bit of decay, a low pass for the click, and set the pitch modulation to 90.
•Adding Distortion and Tonality: I used Filter+ for distortion to create overtones, then added a convolution reverb with short metal or wood delays to impart some tonality to the kick.
•Filtering and Mixing: I used an SVF with a notch filter to carve out frequencies and mixed this with the dry signal to add just a touch of tonality.
•Further Effects: I used FX2 to cut out mid frequencies, added distortion, and then a hard clip. I also created my own preset for this.
•Hi-Hats and Velocity Sensitivity: For the hi-hats, I lowered the mix knobs and adjusted the velocity sensitivity to create a basic pattern, focusing on accentuating the offbeat.
•Snare and EQ: I created a simple two-step beat for the snare and used Filter+ and EQ5, followed by a hard clip. I also made some adjustments to the snare’s tuning.
•Layering with XO: I layered hi-hats using XO and a preset I made. I swapped samples in the combiner to create new hi-hat sounds.
•Bass Creation: I started the bassline using Phase 4, aiming for an E note. I adjusted the operator settings and used an LFO for modulation. I added EQ and a peak limiter for the bass.
•Bass Modulation and Mono Voices: I ensured the Phase 4 was set to mono voices and played with the release settings. I also used a second bass synth for variation.
•Drum Grouping and Transient Control: I grouped the drums and applied EQ and transient control, followed by FX3 and multi-band clipping.
•Melody and Chords: I considered adding a melody or chords, playing with different scales and chords to match the track’s feel.
•Final Touches and Mixing: I did some final mixing, added effects like hard clipping on the master, and focused on getting a loud, clear mix.
•Finishing the Track: After laying down the basic structure and elements, I planned to spend more time tweaking and refining the details, possibly changing the snare and adding more layers.
Please REPORT in Comment Broken Links